Deployment of a Microservices Application on K8s
Hey there, awesome readers!
Guess what? I've decided to take a little detour on my tech journey. From the world of Flutter and Android development, I've taken a wild leap into the cloud services and DevOps realm!
In this blog, we're going to dive into some super cool stuff. First up, we'll demystify Kubernetes - what is it, and why is it the buzzword of the tech world? Then, we'll unravel the mysterious world of microservices. 🚀
So, grab your favorite snack, get comfy, and let's embark on this tech adventure together. By the time you're done reading, you'll be shining brighter than a supernova in the tech galaxy! 🌟🚀
Kubernetes:
So, what exactly is Kubernetes? Well, it's like the control center for your starship (or app). Kubernetes, often lovingly referred to as K8s (pronounced "Kates"), is an open-source container orchestration platform. Think of it as the brain that manages and scales your containers (the individual parts of your app) effortlessly.
Why Should You Learn Kubernetes?
Now, you might be wondering, "Why should I bother learning this futuristic-sounding thing?" Here's the deal:
Scale Like a Pro: Imagine you suddenly get a flood of users. Kubernetes can automatically scale your app up or down to handle the traffic. No more late-night firefighting! (for example: huge traffic on websites on a sale day)
High Availability: In space (and the digital world), things can go wrong. Kubernetes ensures your app stays up and running even if one part fails. It's like having a built-in backup system.
Easy Updates: When you need to update your app, Kubernetes does it gracefully, without causing disruptions. It's like changing a tire on a moving car, but way less stressful.
Resource Optimization: It manages your resources efficiently, saving you money. No need to waste energy (or dollars) on excess computing power.
Cloud-Agnostic: Kubernetes plays nice with various cloud providers. You're not locked into a specific one, giving you flexibility to move around.
Let's take you step by step for :
- Do Mongo Db Deployment
- Do Flask App Deployment
- Connect both using Service Discovery
Step 1: Install Minikube:
Update your package lists to make sure you are getting the latest version and dependencies.
sudo apt update
Step 2: Install Required Packages:
sudo apt install -y curl wget apt-transport-https
Step 3: Install Docker
sudo apt install -y docker.io

Start and enable Docker.
sudo systemctl enable --now docker
Add current user to docker group (To use docker without root)
sudo usermod -aG docker $USER && newgrp docker
Step 4: Install Minikube
First, download the Minikube binary using curl:
curl -Lo minikube https://storage.googleapis.com/minikube/releases/latest/minikube-linux-amd64
Make it executable and move it into your path:
chmod +x minikube
sudo mv minikube /usr/local/bin/

Step 5: Install kubectl
curl -LO "https://dl.k8s.io/release/$(curl -L -s https://dl.k8s.io/release/stable.txt)/bin/linux/amd64/kubectl"
Check above image ⬆️ Make it executable and move it into your path:
chmod +x kubectl
sudo mv kubectl /usr/local/bin/

Step 6: Start Minikube
Now, you can start Minikube with the following command:
minikube start --driver=docker

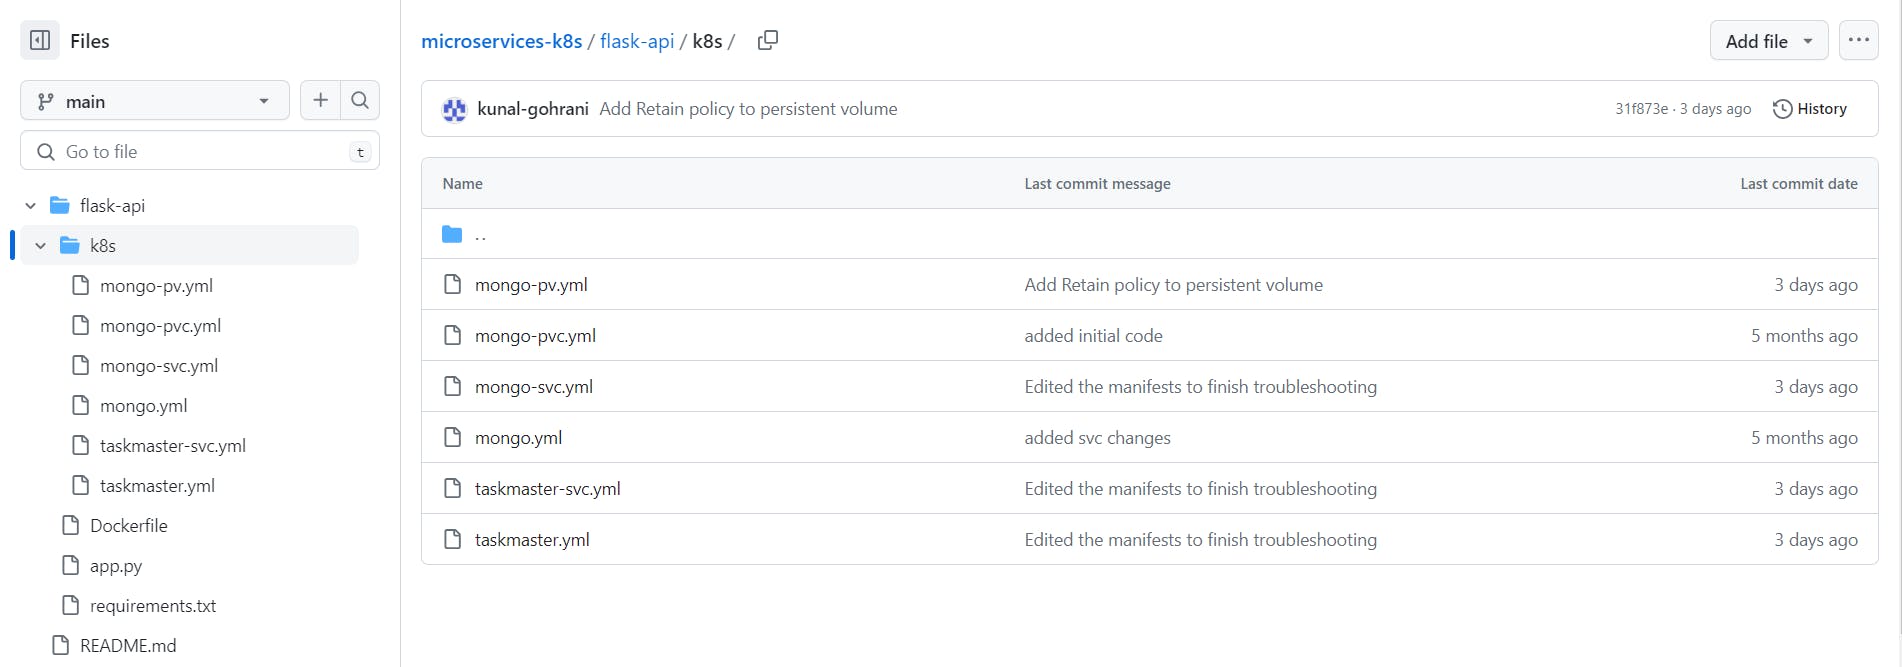
Step 7: Clone the Microservices-k8 GitHub Repository
cd microservices-k8s/flask-api/k8s/

Step 8: Create MongoDB Deployment and Service YAML
This is to create mongo.yml:
And after that create a service yml- flask-api/k8s/mongo-svc.yml:
apiVersion: apps/v1
kind: Deployment
metadata:
  name: mongo
  labels:
      app: mongo
spec:
  selector:
    matchLabels:
      app: mongo
  template:
    metadata:
      labels:
        app: mongo
    spec:
      containers:
        - name: mongo
          image: mongo
          ports:
            - containerPort: 27017
          volumeMounts:
            - name: storage
              mountPath: /data/db
      volumes:
        - name: storage
          persistentVolumeClaim:
            claimName: mongo-pvc
apiVersion: v1
kind: Service
metadata:
  labels:
    app: mongo
  name: mongo
spec:
  ports:
    - port: 27017
      targetPort: 27017
  selector:
    app: mongo
Apply these YAML files to create the MongoDB deployment and service:
kubectl apply -f mongodb-deployment.yaml
kubectl apply -f mongodb-service.yaml

Do the same for taskmaster which you will get in the flask-api git clone:
kubectl apply -f taskmaster.yaml
kubectl apply -f taskmaster-svc.yaml


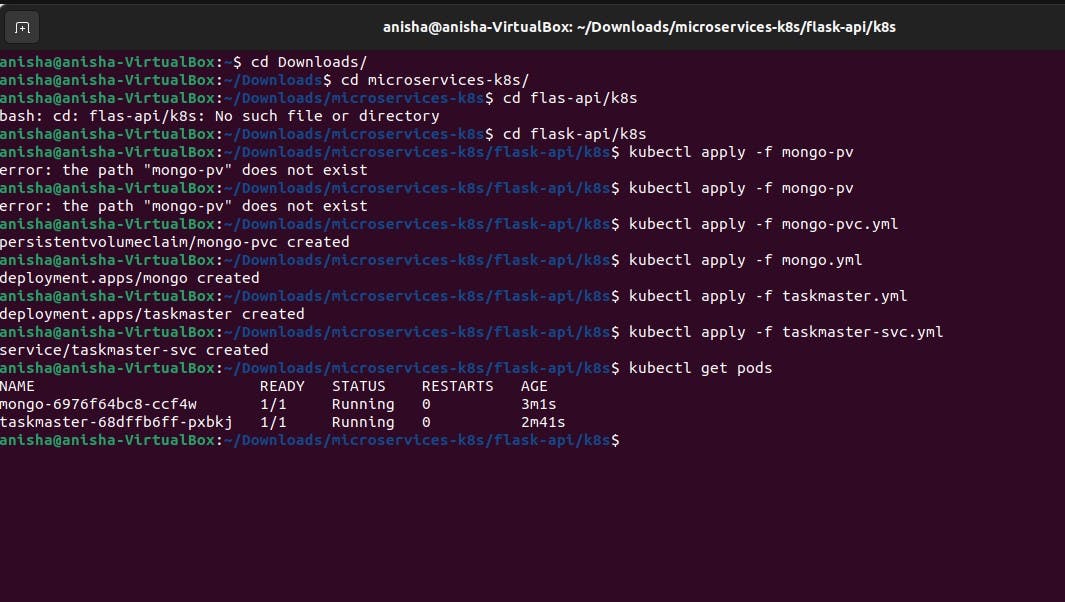
Now you can check your pods:
kubectl get pods
- It should show both the mongodb and taskmaster's pods:

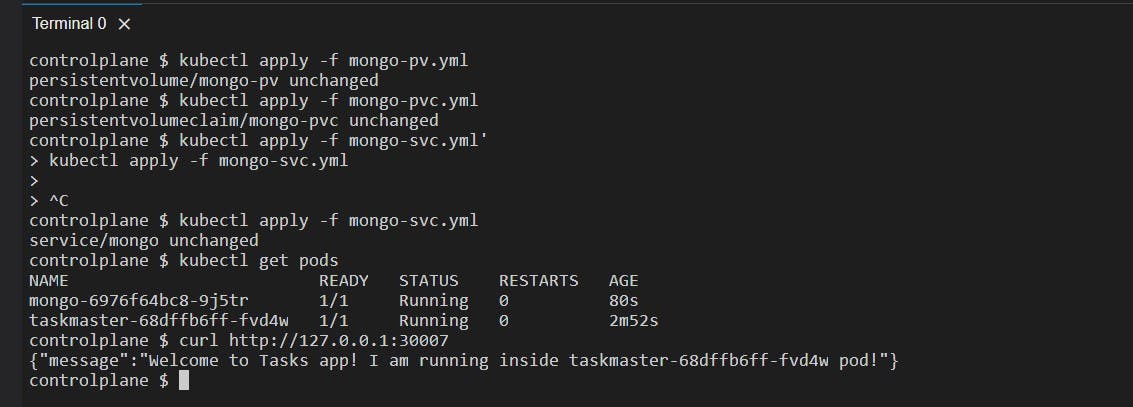
Now, finally, you can check the HTTP request to a web server running on the localhost (127.0.0.1) at port 30007, by this command: and if everything works fine it will display the message as above picture.
curl http://127.0.0.1:30007
And there you go, you have successfully created and deployed the Microservices Application on K8s.
Follow for more upcoming blogs: ✨